Getting ready for babies coming! We found the pattern floating around Pinterest. Here's the link to the blog, and it has a link to a free pattern that we used for this project. Since we're both having girls, we wanted to get super-girly patterns! Angela got the cute butterflies, and Calista got the Minnie Mouse one! We got a yard of both kinds of material, some thread, and some Velcro.
 |
| Cute cotton! |
Next, we assembled the printed pattern and pinned it to the cotton. Let me tell you, the printed paper pattern was a MESS! It was super confusing to tape together, and took some time to figure it out. Be warned: if you try this pattern, it doesn't make sense, and you'll end up with an extra piece.
 |
| putting the pattern to use |
 |
| Pinning |
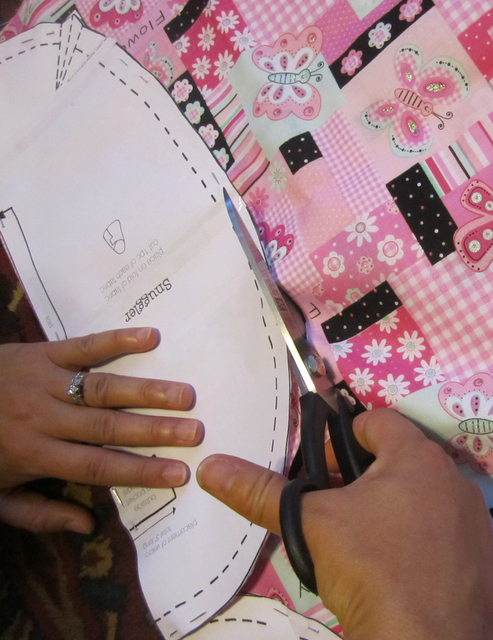 |
| snip snip |
We then used the same pattern on the fleece. Calista didn't want to wait for the paper pattern, so she just pinned the cotton cutout on the fleece and snipped away!
 |
| Same pattern |
 |
| Minnie Mouse to the rescue! |
Sewing time came next! We had some issues with the sewing machine messing up, so that was a bummer. We also spaced our project over a number of days, meeting at least three times to finish everything.

We pinned the cotton and fleece together, and spent some time trying to figure out exactly where the pocket part fit in the pattern.
 |
| Cotton and fleece pinned |
 |
| Almost finished sewing the two together! |
After some sewing, flipping, and more sewing, it was time to put the Velcro on the swaddler!

We just decided to sew it without the pattern, and made an educated guess where to put the Velcro.


We sewed MOST of the Velcro with the sewing machine, but then it stopped working. Thankfully, Angela knows how to sew by hand, and finished the Minnie Mouse swaddler accordingly.
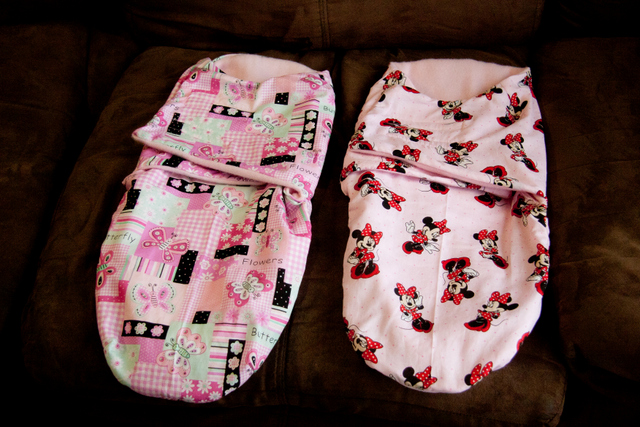
And they're done! Don't they look super-cute! Here's another picture of what one looks like open:

Our little girls will be nice and cozy this fall and winter! Our plan is to take a picture of our little girls in the swaddlers once they both get here! That will be the cutest picture yet!