Anyways.
The original website for the shrug is here.http://www.cutoutandkeep.net/projects/tshirt_shrug
Angie and I first adventured to Hobby Lobby to find ribbon/rope with which to tie the shrug, and thread to match the t-shirts. Success!
 |
| Red=Angie Blue=Calista |
We then used said amazing scissors to cut the t-shirt according to the directions: around the collar and down the middle of the front of the t-shirt.
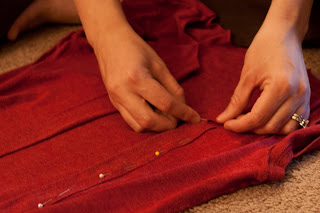
Then fold the t-shirt over about an inch and pin all around. The corner can be however you decide: you don't really see the corner in the end product anyways. Also, it helps to pin your pins in the same direction all the way around to make sewing easier.
Then sew! Angie brought her sewing machine over to my (Calista's) apartment, and taught me how to sew. I did sew a looooooong time ago, but it was pajama pants with slinky material, and I ended up in tears. This, thankfully, was much more productive.
 |
| Sewing along the edge. |
 |
| Keep it steady |
 |
| The bobbin |
 |
| Threading the needle. |
Next, we pulled/threaded our our ribbon/rope through the newly sewed casing. Angie was able to pull hers through pretty easily. We ended up needing a safety pin to get mine through.
 |
| Finished! |
 |
| I really like the angle of this picture (good job Angie!) |
On the website, you can post your version of the shrug. I'd love to hear if anyone tries this one!


